|
|

Use a Tripod
Edited by Shar Scofield All rights reserved. 
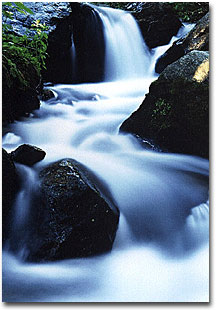
Like most people, I ventured into photography with only a camera. I assumed that since I lived in Colorado, one of the most photogenic places in the country, I could simply wave the camera around, push the shutter button and create spectacular images. So I would head to the mountains, toting only my camera and my enthusiasm, burn an enormous amount of film, followed only by disappointment with the images produced. They were clearly not accurate representations of the phenomenal beauty I had experienced. Overwhelmed and discouraged by the continually poor results, I eventually retired my camera and the ambition to capture images like those on calendars and postcards. Hayden Creek, Sangre De Cristo Mountains, Colorado Months later, inspired by a friend and talented photographer, I dusted off the camera and humbly began learning about landscape photography. One of the first rules, my friend informed me, was the usage of a tripod. So I obediently purchased one and started dragging it along. Initially, it seemed to only slow me down and I found it a hassle to fumble with the screw in attaching my camera. It also seemed to limit my ability to position the camera; all assumptions commonly made by first time tripod users. However, with persistence and a few more valuable tips from my friend, there were not only improvements in my composition, but I was actually enjoying this versatile piece of equipment. Attaching the camera and working its controls had become habit and I was excited about the newly discovered possibilities. I increasingly found myself in shooting positions and capturing images that, prior to my tripod, were not achievable. One memorable occasion happened high in Rocky Mountain National Park on a late October morning. My wife, Kati, and I were spending several days in Estes Park, Colorado, celebrating our anniversary. This was family time, not a photography outing, but I brought the camera just in case we saw something exceptional. A few days into our stay, I managed to talk Kati into letting me head up to one of the parkís spectacular alpine lakes to catch the dawn light.
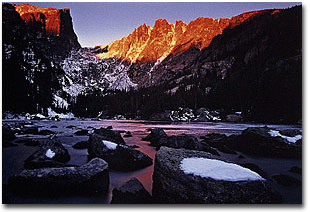
Early the next morning, in complete darkness, I struggled up the slick, icy trail to Dream Lake. Reaching it well before sunrise, I had plenty of time to consider various compositions before dawnís magical light emerged. To eliminate some distracting shoreline elements, I explored compositions that required me to step out away from the shore. After checking the view from about a dozen boulders and various camera heights, I decided the best composition required the camera to be positioned at knee level on a small rock surrounded by frigid water. Because of the cramped position, it was difficult to fine tune the composition, even with the use of a tripod. Without the tripod, it was virtually impossible to manage all the equipment and necessary preparation. After getting everything set up, it was simply a matter of keeping warm and waiting for the sun to perform its magic. The tripod played another of its significant roles -- maintaining my composition and settings while I relax and await the perfect light. At practically every workshop we hold, Iím reminded of my early days by participants who are following in my footsteps. They struggle to gain familiarity with a piece of equipment that theyíve owned but rarely used. Often times, they are using the wrong kind of tripod, resulting in broken equipment and missed opportunities as they fret with adjustments. Itís easy to understand why people opt to shoot without one, but never underestimate the power of a tripod. Steadying the camera may be the most common reason for using a tripod as the shake of oneís hands will often result in a blurred photograph. Although this alone is sufficient reason, there are other significant advantages. A frequently overlooked benefit of using a tripod is the ability to capture precisely the composition desired. With the camera safely situated, the photographer is free to carefully study all the compositional elements of the image. Eliminating distracting objects, such as litter, unwanted tree limbs, too much bare soil in the foreground, etc. that compete with the main subject is one of the primary tasks. Remember, an image composed from above or below standing eye-level often results in more interesting photographs. Typically, people do not crawl around on the ground to get a better view, therefore, a photograph taken from ground level is a fresh perspective that viewers often enjoy. Near ground shots, such as the one of Dream Lake, are much easier to produce with the aid of a tripod. Once the composition is decided and the camera is positioned, the tripod affords the photographer time to decide the more technical aspects, such as proper aperture, correct metering, filter usage, shutter speed, etc. Additionally, you are less likely to drop fragile lenses, filters and attachments when affixing or removing them. A novice, in particular, can benefit greatly from the use of a tripod simply because the act of placing a camera on a tripod helps to slow one down, to consider the many details of capturing an attractive image.
What is a proper tripod for landscape photographers? An important feature to look for is a tripod with legs that do not attach to a center post. Most landscape photographers shoot from uneven ground, hillsides and other precarious places. The most suitable tripod for these varied surfaces is one with legs that move independently and can lock in a variety of positions out to 90 degrees. Landscape photographers will also be best served by a tripod that can adjust very close to the ground and support a camera at standing height without having to crank up an extension shaft. Another useful feature is a quick-release head, allowing you to simply pop the camera on and off with a spring loaded snap or a flip of a finger. The tripod head should tilt to hold the camera in vertical format. Photographers need to be attuned to their actions and not allow tripod use to negatively affect their creativity. A common mistake to avoid when using a tripod is premature camera attachment. Photographers often approach a location, extend the legs of their tripod, secure their camera, and start shooting. Remember, the most interesting shots are often found from ground level or half-way up a hill twenty yards back. Before attaching the camera to the tripod, explore the area and experiment with different angles, heights, locations, vertical vs. horizontal, etc. While I enjoy scouting a location with only the camera in hand, the thought of pushing the shutter release without supporting the camera on a tripod makes me feel uneasy. When youíve grown accustomed to using a tripod, and feel uncomfortable without it, youíll know itís officially a part of your camera gear and youíre on the path to improved photography.
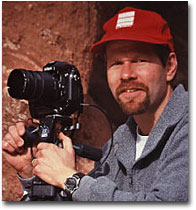
Andy Cook is an enthusiastic and gifted photographer who enjoys sharing his knowledge. His images reveal skillful attention to detail in composition and technique. Andy's work has been published on the cover of the magazines "The Voice" and "Real Life" and in the coffee table book "The Horizon's End". He has sold images to the "Colorado Vacation Planner" and "Wandering" and has been published several times in the Colorado Springs newspaper "The Gazette". Additionally, his images have been published in the magazines "Photo Insider" and "Outdoor & Nature Photography". His work can also be found on display at REI OUTFITTERS, Boulder Street Gallery, New West Art & Frame Company, and Accent Photo, all located in Colorado Springs, CO. Andy's work has been selected for display at the Colorado Springs Airport. Editor's Note - Andy Cook is an instructor for Rocky Mountain Reflections Photography Workshops.
|
|
|
 Dream Lake, Rocky Mountain National Park, Colorado
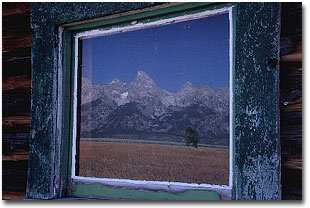
 Grand Teton reflecting in old cabin window, Grand Teton National Park, Wyoming