Minolta Dimage Scan Dual III: A Quick ReviewText and photography copyright James Hutchison

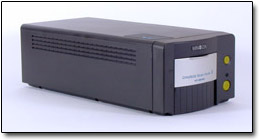
Minolta's Dimage Scan Dual III film scanner.
|
|
If you're already familiar with budget scanners, you'll know that scanning film on flatbed scanners costing under $500 is pretty well a waste of time. Assuming that 4800 DPI is adequate to scan film is wrong, because it comes down to the quality of the optical system that delivers the image to the CCD. Keep in mind you get what you pay for. So on that note, I'd like to say I am extremely pleased with Minolta's Dimage Dual Scan III. They didn't sacrifice features or quality on this one.
This scanner caught my eye while surfing various photography web sites. All of the reviews gave glowing remarks on its ease of use, software, and picture quality. When I figured out it could be purchased for less than $500, it didn't take long to make arrangements to visit a local photo superstore while on a business trip in Toronto. After a live demo and a surprise in-store discount, I walked out with scanner in hand, anxious to get home and finally release my hundreds of slides into the digital ether.
Set-up was a cinch. It took no time at all to install the software, plug the USB cable into my PC, and scan a slide. I was impressed with the results of my very first attempt. Two nice features - something Minolta calls Pixel Polish and Auto Dust Brush - helped render an accurate and clean scan. The brilliance and sharpness of transparencies is also rendered truthfully.
An 8 X 10 printout of the scan on my HP 7550 was stunning. Because I had been waiting for quite a while to digitize my collection of transparencies, my wife had to pry me away from the office for the next 2 weeks. Scan – print; scan – print, and on and on I went.
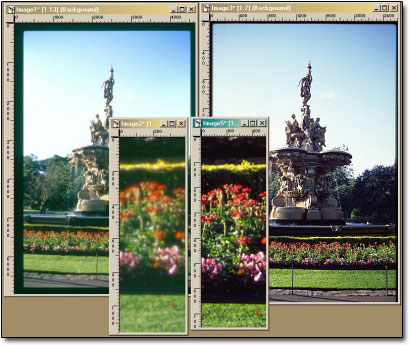
Compared to my previous flatbed scans, the difference was obvious. Scanning a slide on my Microtek Scanmaker 5900 flatbed at 4800 DPI yields a 95 MB image that lacks in detail. The optics simply do not deliver a crisp image to the CCD. Compare that to a 30 MB clear image from the Minolta - no contest!

Compared to the results from a flatbed scanner (left), the Dimage Scan Dual III produced clear, well-detailed scans.
|
|
Minolta's Dimage Dual Scan III Specifications
From a technical standpoint, anyone can get the specs for this baby on the ‘net quite easily, so I won't bore you with them all. But the major ones you'd probably be interested in are the following:
- 2840 DPI
- Scans 35mm positive and negative, and APS with optional adaptor
- 4.8 DMAX in 16 bit mode
- 8 bit, 16 bit, and 16 bit linear options
- Multiple sampling for noise reduction - up to 8X
- Auto and manual focus
- Comes with driver, scanning software, Photoshop Elements, and 2 film trays (film strips and mounted slides)
- Operating systems: Apple and Windows
Workflow
There are two ways to scan; via the twain capture option in Photoshop (or whatever program you use), and the utility itself. If you wish to do batch scanning, use the utility. That way you don't have to exit out of the software if you plan on touching up each scan. I use the twain capture feature if I'm only doing one slide, as the scanning software must be closed for the image to appear in Photoshop.
There are three basic steps, starting with an index scan that creates thumbnails of each slide. After highlighting which slide to scan, it will then perform a pre-scan, which is a more detailed capture. It will invoke auto-focus at this point if that feature is chosen in the preferences window. Here's where you crop as well, or use auto-crop, which works quite well if you wish to use the entire frame of the picture. Then the final scan takes place after you're done tweaking colors, etc. If
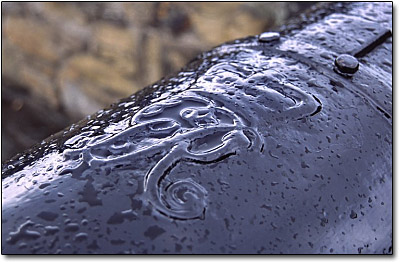
 the scanner is set to sample 8 times in 16 bit mode, find something else to do for a few minutes. It's a bit slow, but for slides with alot of dark shadow detail, it can't be beat (see canon photo).
Some of the finer points when scanning are actually fun, like the manual focus. Pick a spot on the film or slide you want dead-on, move a slider back and forth until a black bar is the longest, and you now have that point in fine focus. The scanner does a pretty good job in auto-focus mode, so I just let the unit do its thing.
There are other "nerd buttons" to play with as well, including a barrage of image manipulation options such as histograms, color balance, etc. I tend to play with the final product in Photoshop or Paint Shop Pro, instead of using the scanner software. But Minolta's software is very capable, it's just that the pre-scan image is a bit grainy, so I make my adjustments on the final scan.
Any Negatives?
Pun unintended, but maybe just a couple:
- It doesn't have Applied Science Fiction's Digital ICE for dust and scratch removal. There were some slides that required manual intervention - long scratches are only partially removed with the dust brush feature.
- The scanner is actually rather light, so pushing the film tray into the opening is a two-handed operation as you must hold the unit down with your other hand. I did manage with just one hand, wiggling the tray just a bit side-to-side until the gears caught and took over, but it takes more time fiddling to avoid pushing the scanner away from me.
Conclusions
It's a Great Value! If you want a great scanner at an even greater price, in my opinion this product will suite both the casual user and professional quite adequately. Minolta released a Scan Dual IV, which scans at 3200 DPI with all the same features and software, so if it's like the III, I'd nab it right away if you're looking for a well-priced, well-performing film scanner.
JH-NPN 1257
About the author...
Jim Hutchison is a hobby photographer who lives in Calgary, Canada with his wife Moira and Buddy the cat. You can visit his website at www.jamesphotography.ca.
Comments on NPN wildlife photography articles? Send them to the editor.


| 


