Ten Commandments of Composition |
Exposure, sharpness and correct composition are the three ingredients in making a pleasing photograph. Proper focus and exposure are a function of your equipment and your ability to be proficient in these two areas. Even automatic metering is quite accurate much of the time. By using a tripod and understanding depth of field while using auto focus at times will allow a reasonably good image to be produced.

On the other hand, composition is dependent on you and your ability to encompass what is necessary to produce the desired results. No matter how you focus correctly, or expose correctly, if the image is uninteresting, it will be boring to the viewer. The old saying “Garbage in= Garbage out” is the order of the day when it comes to proper, or pleasing compositions. All the expensive equipment you want to carry around can not fix an uninteresting composition.
Like always, and as my workshop attendees sometimes get sick of hearing, I base my compositions on the basics as defined succinctly by John Shaw.
Prior to attempting the image, ask yourself:
1) Is there a subject? 2) Is the light good?
If you can’t answer yes to both it’s going to be tough to create anything worth keeping, especially if question #1 is NO!
This brings me to my Ten Commandments of Composition. These could be listed in any order, but #1 and #2 are pre-eminent. Each “commandment” is in and of itself a whole discussion worthy of an essay alone. However, I’ll briefly list the ten things I always consider when making photographs.

ONE: A Strong Subject Is A Must.
Easy right? But then what can you do with it?
Can you easily make the subject the center of interest? Is there clutter around the subject? Is the subject (especially fauna and avian subjects) in good enough shape to render interesting. Often landscape images are no more than postcard shots, not fine art prints (I’ll talk abut being an artist later) due to lack of interest or lack of concern by the photographer about what he or she is trying to convey.
Go to the bookstore and look at the many coffee table books by the well-known masters. Without exception, there is always strong subject, which is the center of attention without distracting elements. Always take time to ask yourself exactly what you are trying to convey in your image.
In making abstract photographs, patterns in and of themselves are interesting to photograph. A pattern can be a subject. Color can be a subject. Subjects need not be obvious when photographed correctly.
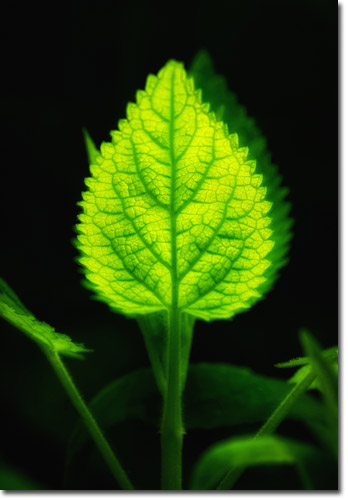
TWO: Make The Light Work.
You must decide how to use the light (assuming it is good light) as an asset. For example, often back lit images are quite effective, but lot’s photographers never consider backlighting. You need to understand what light works best for your image, and then make the best use of what’s available. The image selected here is side lit. There is a repeating pattern of another leaf behind the subject enhances the feeling. A slight “Orton affect” or blur was added in the final processing. The more dramatic the light the more interesting the image becomes. Don’t be lazy, shoot at the golden hour (one hr before and 1 hr after sunrise and sunset) Make use of bad weather which sometimes provides them most dramatic light available.
At times one must just walk away from photography, as nothing you can do to make the image photographic. Better walk away than force yourself to take a bad photograph.

THREE: Decide How To Use The Subject's Elements
This is a very important rule to follow. Space is a very important element in relationship to my subject and the other integral parts of the image. Creating some space between the subject and other structures or elements of the image can make or break an image. Note the spacing between the tree trunks in the image above. Eliminating merges is primary to successful photography.
At times, to convey the feeling in an image, it is acceptable to cut off parts of the subject.

This is particularly evident in close up photography. Sometimes by letting element like the petals of a flower run off the image creates a wonderful feeling and thus a successful image. Experiment, but always keep asking yourself if this is adding or subtracting from your image.

FOUR: Use The Rule Of Thirds
This brings me to the rule of thirds or what I call proportional photography (I have a complete article on proportional photography which can be read in my -Book, Series 1 for sale at www.jackgrahamphoto.com). Centered images usually just don’t work. Note I said usually, not always. As we move our eyes across the image there must be something (often called a leading line) to draw the viewers eye into the subject.
Basically what the rule of thirds is the use of a grid, like a tic-tack-toe board in your viewfinder( You can purchase such a grid and replace your focusing screen with one for your Nikon or Canon cameras if you don’t have one) This intersecting points are the “power points” where, when placed on these points makes the subject stronger.

It’s up to you to decide which point to place the subject. A bird looking to the left works better on the right, an animal or building might look better on the lower points allowing for a background which aids in telling the story of your location. Remember, unless it really works (and it can) never center the subject.
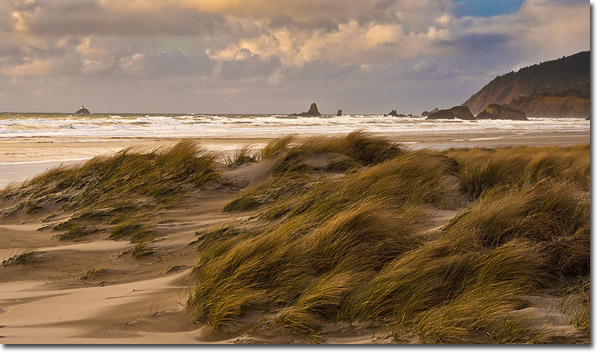
FIVE: Anchor The Subject Or Look For Patterns
There is nothing like a strong anchor to make a subject stand out, especially in landscape photography.
I often refer to David Muench’s images when talking about anchoring the image. He is the master at this. A strong anchor eliminates foreground clutter and distractions. The anchor is the glue that puts the images together and conveys emotion to the viewers.
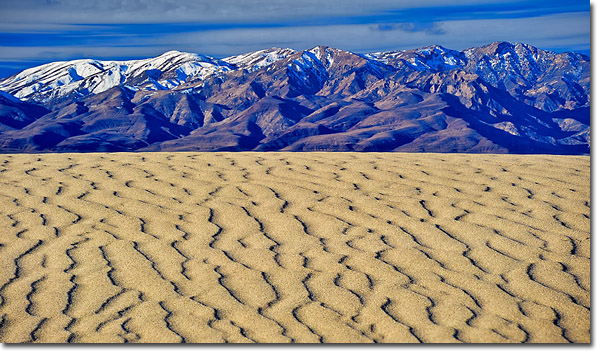
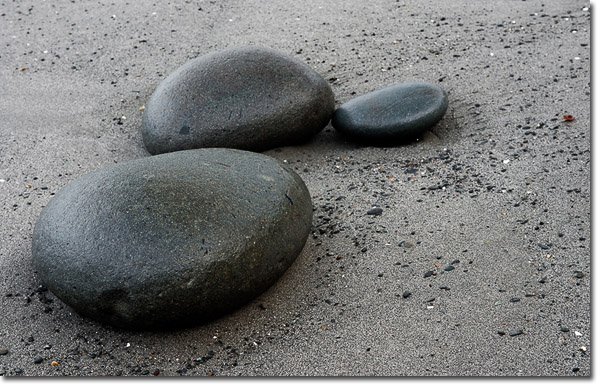
What if there are not any anchors available? Again, especially in close up photography as well as other forms, there just are not the huge rocks, or river etc to anchor the subject. I used the patterns in the sand, in the above image to anchor the image and draw the viewer’s eye up to the snow capped mountains in Death Valley. At that time I always look for patterns in the subject, no matter if it’s a flower or mountainside to strengthen the interest of my image. As previously stated, patterns, in and of themselves are interesting to photograph. A Pattern can be a subject. Color can be a subject. Subjects need not be the obvious.
SIX: Eliminate Junk
Often a workshop attendee or photographic acquaintance will come up to me and say, "You know that shot of yours at “such-n-such… well I’ve got that same shot too." As I view this “identical image” I quickly realize that they really don’t. Why? Well they may have the subject nailed, nice and sharp, proper exposure using the rule of thirds, etc., but somewhere in the image there might be a tree trunk, or a contrail in the sky, too much foreground, or just a leaf off to the side that’s too bright, pulling our eye off the subject (in nature, our eye goes to the brightest spot in the image, be careful).
Pay particular attention to cluttered foregrounds or foregrounds made of useless material having little to do with the subject. Your depth-of-field preview button should pull everything into clarity. Remove what does not lend anything to the image. Note the two images below. By framing the image differently, moving somewhat, but most importantly, eliminating useless foreground, the image on the right is certainly much more pleasing and interesting.

“But I can fix it in Photoshop!" Can I pull out the knife now? Working pros sometimes “fix it in Photoshop” but not as much as you think. The more you get it right in the camera, the more your image will be successful.
So look around, always check your corners (remember if you do not have a 100% viewfinder, this is especially noteworthy) and look for that little tiny distraction. They are there. You must eliminate them from your image.
SEVEN: Vertical Or Horizontal?
These two elements can convey a 180-degree feeling in an image. Who’s to say which is right? The right one is the one you like. However, in the field often we are too busy with exposure, focus, lighting etc. to make this cognitive choice. I suggest photographing your image both ways and deciding which one is more pleasing when you get home, on your monitor. I see few vertical calendars, and few horizontal magazine covers. Take into affect how the image will be used.
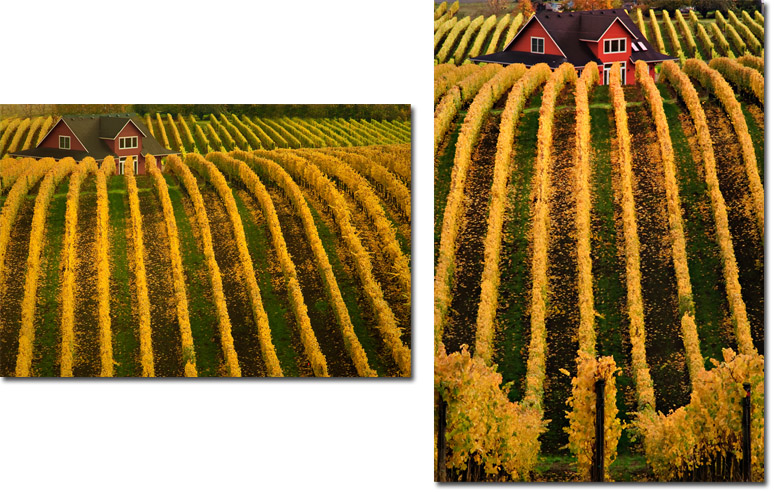
I sometimes notice photographers, especially amateurs not making vertical images. Believe it or not, when I ask them why, they tell me “It’s too difficult to photograph vertically with this tripod head." And they are usually right too. Consider purchasing a top quality tripod head that easily converts from horizontal to vertical. Some lenses have tripod collars. You can also purchase “L” brackets for some tripod heads or quick release plates that make the transition quick and seamless. Don’t sacrifice vertical images due to poor equipment.
EIGHT: Pick The Right Lens
Using the right lens can make or break your entire image or convey a totally different emotion that desired. Though both images below are acceptable, they convey two totally different feelings.
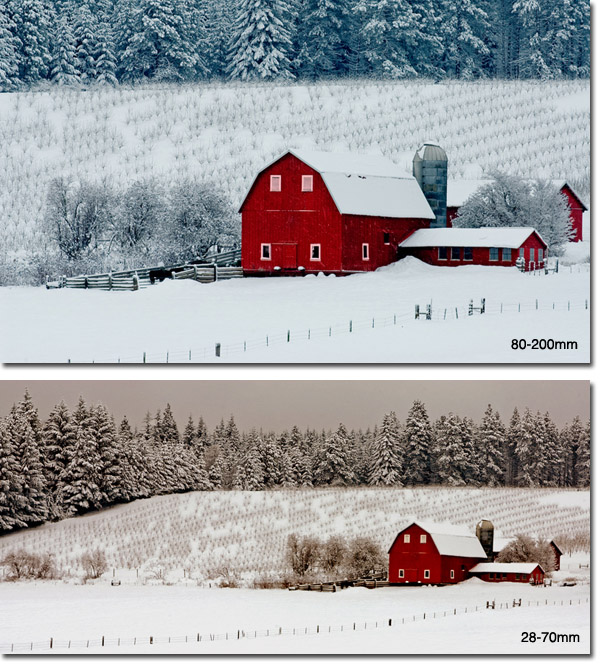
In conducting as many workshops as I do I often see folks trying to photograph a great subject with the wrong lens. Why does this happen? I truly believe that some, if not most photographers are more comfortable, or “see” in certain focal lengths, and often neglect ones more suitable for a specific image. Other photographers are too much in a hurry (see commandment # 9 below) to experiment in order to select the right focal length.
It takes some time to unpack, put on one lens on the camera, and then try another. One aid is to use an empty 35mm slide (large format photographers can use a larger sized cut out made of cardboard). By studying the scene through the empty slide is becomes clearer and easier to determine how the powerful parts of your scene affect the subject. In time I have developed a good sense of what lens to use, but far from always.
NINE: Photograph Less And Look More
Perhaps this commandment should have been #1. I often see photographers in the field with better equipment than I, approaching a subject hastily, not understanding the subject, the environment, the light that goes into making an artistic photograph. I hear shutters clicking like machine guns.
Not only are these images made this way likely to fail, the photographer may as well be handholding a cheap point & shoot camera. He or she has removed any aesthetic feeling of the scene, both photographicly as well as the self enjoyment that a location can deliver. There is no doubt that the photographer that slows down, studied the possibilities will always walk away with a superior image. It is not uncommon for me to be or on a day's shoot and come back with 10 -15 frames. I often remember my days using film, and use those as a reminder that slowing down is key to success. If I have one successful image per day in the field, I would be a happy guy!
What slowing down does is allows one to see, to determine the best angle, position or location to set up your tripod. Learning to see allows one to take the time necessary to make a photograph that is artistic rather than a post card shot.
TEN (And Maybe The Most Difficult): Become An Artist
Understanding the elements of a certain location, being proficient on your equipment, and understanding the compositional aspects of making a successful image is only part of the equation. Being an “artist” is using these ingredients successfully to make emotion-evocating images, using the vision you have developed. Few photographers are truly “Artists.”
Committing to slowing down and becoming an artist is demanding. Artists are ones who are free to express their emotions though their photography as well as having unlimited artistic freedom. You can not become an artist in haste.
I recommend reading the chapter on being an artist by Alain Briot (as well as the whole book!) in Alain’s book, "Mastering Landscape Photography." Rather than me parroting Alain’s writing, I’ll let Alain go into depth regarding this subject. This is a must read for any serious photographer. I suggest hearing it from the artist himself.
http://www.beautiful-landscape.com/Articles-Book-1.html
It is important to consider what the viewer of your final print will feel, at the time you are making the photograph.
Humans see in multi dimensions. Fine are prints, as great as some can be, are not three dimensional. Often photographers (not artists!) arrive at a location and say to themselves “WOW! This is beautiful. I’m going to make a photograph that when I get home I can show so-and-so what it was like to be here where I’m standing.”
This thought process will often create a failed image. Where you are and what you are feeling and seeing is impossible to replicate to the ultimate viewer. So why try?
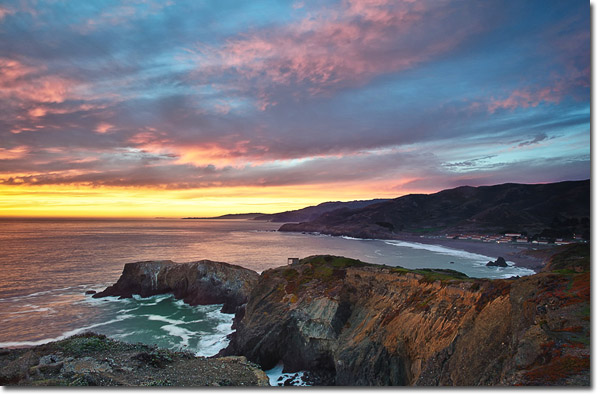
The image below is a sunrise on Hurricane Ridge, Olympic National Park. Can you tell it was cold? Can you tell the wind was blowing a gale? My goal here was to use all the elements and my 10 Commandments to make a fine art print.

The viewer does not have the ability to feel your emotion, smell the smells, feel the breeze, and hear the sounds. You can not transmit that through your print.
Knowing this, do you’re very best to create a Fine Art Photograph, not a photo-log on your experiences.
Comments on NPN nature photography articles? Send them to the editor. NPN members may also log in and leave their comments below.
 Jack Graham has been fortunate to have lived on the east and west coast as well as the Midwest while enjoying photographing the natural world. Jack now resides in the great American Pacific Northwest.
Though known for his many photo workshops as well as being on the faculty of the Great American Photo Workshop and Strabo Tours, Jack has been successful in publication and stock photography as well. Credits include Nature’s Best Photography, Outdoor Photography (UK), California Wild, and many DNR publications, Audubon, Nature Conservancy, Chicago Wilderness and Sierra Club publications as well as many calendar credits. Corporate work includes prints and stock applications for internal as well as publication use. Jack continues to conduct his “Classroom in the field” Photo workshops throughout the United States, and internationally in 2011.
Jack is currently sponsored by, Nik Software, F-Stop Gear, Outdoor Photo Gear, Lensbabys, The Really Right Stuff, Hunt’s Photo & Video, Think Tank, and Bob Hitchman’s Photograph America Newsletter.
Jack is the chair person of the awards committee of NANPA, the North American Nature Photographers Association, as well as FNAWS (Federation for North American Wild Sheep, Mono Lake Committee, & SUWA (Southern Utah Wilderness Alliance). Jack can be contacted at jack@jackgrahamphotography.com.