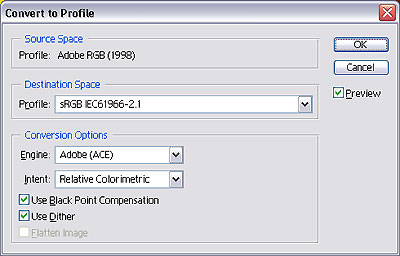
Figure 2: The Convert to Profile dialog.
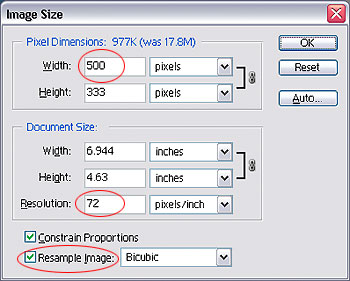
Figure 3: The Image Size dialog.
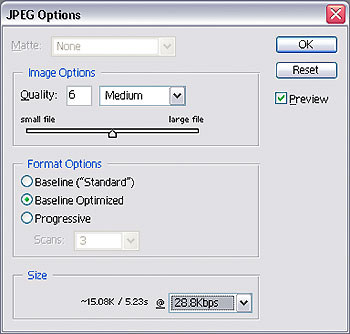
Figure 4: The JPEG Options dialog, accessed by saving a file through File > Save As.
Figure 5a: The image above was saved as a JPEG with the Save As command, resulting in a file size of 26K.

Figure 5b: This time the image was saved with the Save for Web command using the same quality setting, producing a JPEG of only 14K.
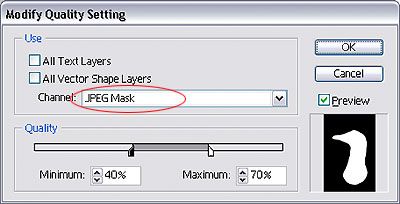
Figure 6a: A rough selection created with the Lasso tool.
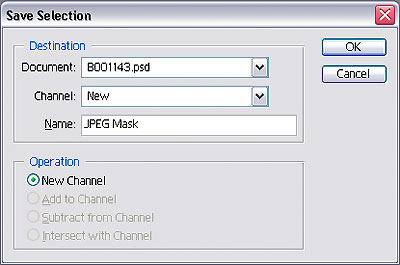
Figure 6b: Saving the selection as a channel.
Figure 6d: Select your channel mask in the Modify Quality Setting dialog, then move the sliders to adjust maximum and minimum quality settings.


